

Showing posts with label Daring Bakers Challenge. Show all posts
Showing posts with label Daring Bakers Challenge. Show all posts
Tuesday, June 12, 2012
Saffron and Cardamom Challah


Monday, April 30, 2012
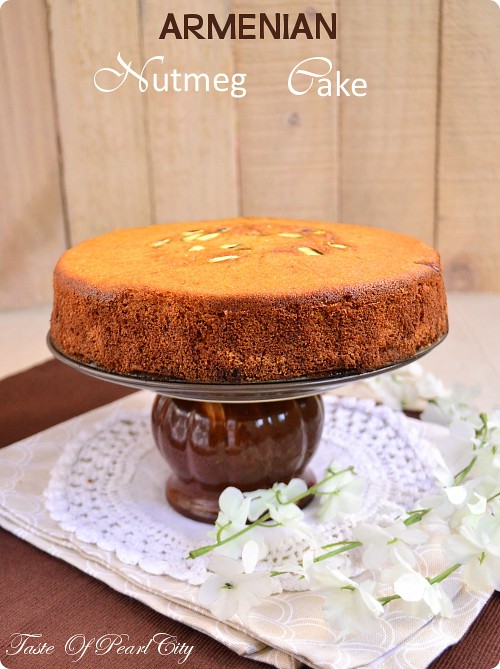
Armenian Nutmeg Cake
Wednesday, March 28, 2012
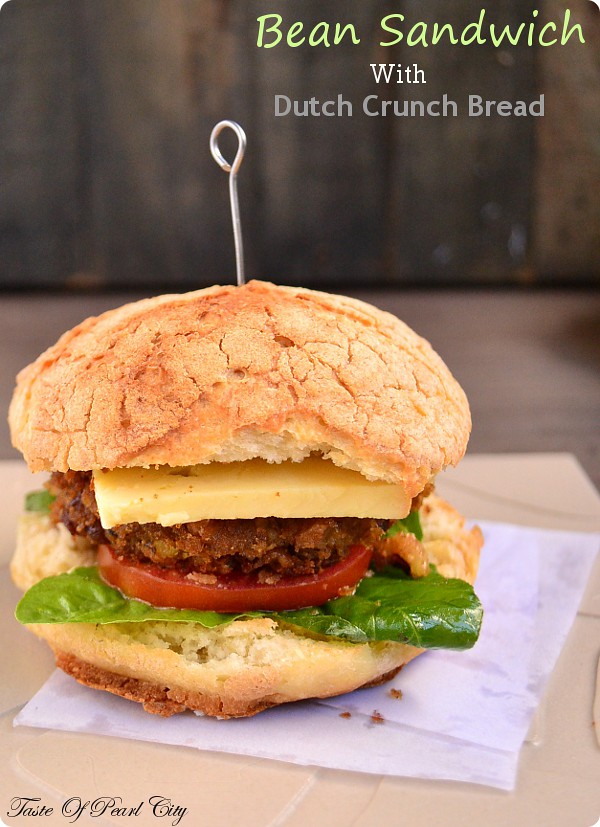
Dutch Crunch Bread and Bean Sandwich for Daring Baker's Challenge March 2012
Tuesday, February 28, 2012
Coconut and Lemon Loaf for Daring Baker's February 2012

Friday, January 27, 2012
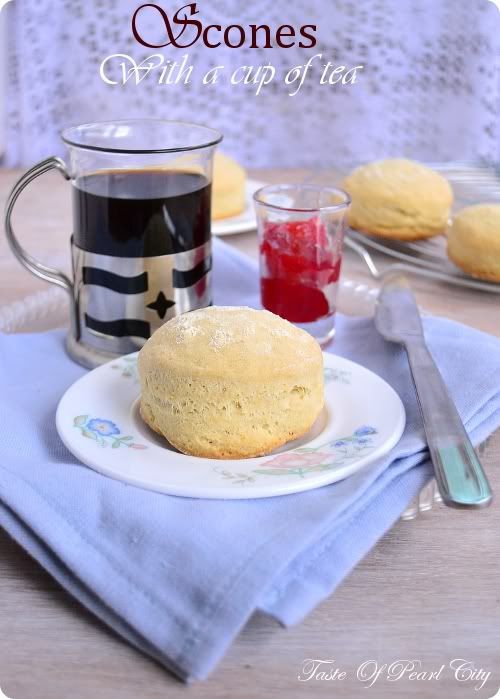
Basic Scones for Daring Baker's January 2012
Friday, October 28, 2011
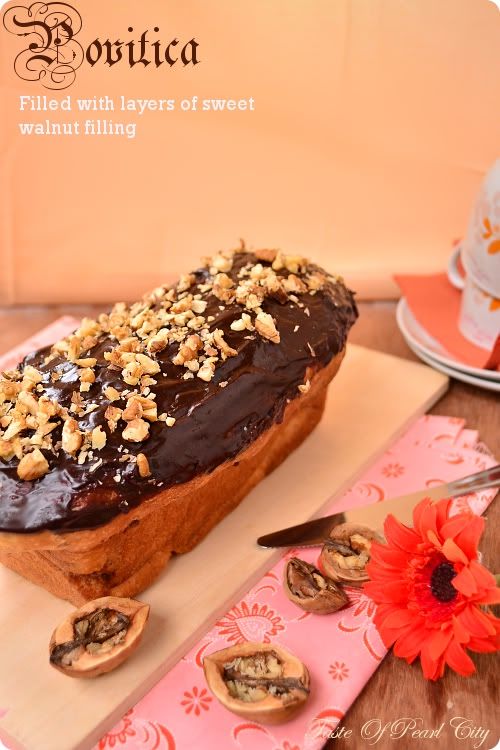
Povitica- Daring Baker's Challenge for October 2011
Hi All, I'm back after a very long time, I can imagine what's going on when you are reading this, where did you disappear suddenly.. Well, I have some reasonable reasons for not being blogging in the past few weeks, something which is more important than blogging.
Tuesday, August 30, 2011
Daring Baker's Challenge For August 2011 : Candylicious

Monday, June 27, 2011
Baklava Rolls for Daring Baker's Challenge June 2011


Sunday, March 27, 2011
Meringue filled flower buns for Daring Baker's Challenge March 2011

This is my 8th challenge with Daring Baker's and my last challenge in Germany. Hopefully I'll continue the challenges in India after a break. This month our challenge was by Jamie and Ria. Our challenge was to make Meringue filled yeasted coffee cake. Jamie's version was sweet buns filled with meringue, chocolate and nuts. Ria's version was a saffron dough filled with meringue, cashews and a touch of garam masala. I would have loved to make Ria's spicy and aromatic version but this time I adopted Jamie's version, next time Ria's may be. This was so good, so definitely I'm going to make it another time. Thank you Ria and Jamie for this wonderful challenge.

Saturday, February 26, 2011
Panacotta in Eggshell- Daring Baker's Challenge for February 2011


When I was a kid , puddings using agar agar is something very common in my place. Although it din't have such a smooth texture as panacotta, still agar agar puddings are my favourite. Particularly when my mom makes it in egg shell, I just loved it. Yes, you heard it right, it's egg shell. Don't worry it's not going to poison you. We always name it as sweet egg and have fun with it. So when I saw the challenge for this month, I decided to make it in egg shell, to bring back all my childhood memories and I did some in regular glasses too.

Thursday, January 27, 2011
Biscuit Joconde: Daring Baker's Challenge for January 2011

This month our challenge is given to us by Aesthroshe, she challenged us to make Biscuit Joconde, imprime/entremet. Imprime is a French baking term. Joconde is nothing but a thin flexible cake made with different patterns. This is used in desserts as a base or covering. This flexible cake easily fits in the mould and it retains it's texture even after chilling.

The moment I saw this as a challenge for this month in Daring Baker's forum, it was like a wow for me and I planned so much for that. Guess what ! I didn't make anything according to the plan. I was actually planning for some nice filling like blackberry mousse, mango mousse, cheesecake, cold souffle etc...
Since I left till the last moment, I mean very last minute, I made it only yesterday night. So I ended up making in a simply chocolate mousse, topped with readymade custard mix and jelly. The custard was bit wobbly and it was quite hard to hold it's shape in the mould I made. However the joconde was absolutely amazing. I have decided to make this for all my cold dessert as a base. I have to say millions of thanks for Aesthroshe for this amazing recipe which she has given.
Preparation Time: For Joconde- 1 hrs
For Filling- 1 hr
Cooking Time: 15 minutes
Ingredients:
Joconde Sponge:
Ground Almond- 85 g
Cake flour- 25 g( for every 100 g of plain flour add 1 tbsp of cornflour)
Icing Sugar- 75 g
Eggs- 3
Egg white- 3
White granulate sugar- 1 tbsp
Butter- 30 g( melted)
Joconde decor paste:
Butter- 200 g softened
Cake flour- 170 g
Cocoa powder- 60 g
Icing Sugar- 200 g
Egg whites- 7
Filling:
Chocolate mousse:
Plain chocolate- 225 g
Butter- 30 g diced
Eggs- 3 separated
Sugar- 55g
Water- 4 tbsp
Double cream- 125 ml
Custard Topping:
Vanilla custard powder- 2 tbsp
Milk- 250 ml
Sugar- 2 tbsp
Jelly topping:
I used readymade halal jelly powder according to package instructions
Method:
Prepare the mousse:
Melt the chocolate and water in saucepan over low heat until it melts. Remove from heat beat in the butter. Add the egg yolks to the chocolate mixture and beat well. Meanwhile beat the egg whites in a clean bowl until soft peaks form, slowly sprinkle the sugar little by little and continue beating until stiff peaks form.
In another bowl beat the cream until soft peaks form.
Fold in the cream and egg white into the chocolate mixture little by little until well combined. Set aside the mousse separately.
Prepare the joconde sponge:
Beat the egg whites and granulated sugar in aclean bowl until it looks firm and glossy. Set it aside. Sift the flour, ground almonds, icing sugar in a large bowl. Slowly start adding the eggs and beat it together. Fold in one third of the egg white into the flour mixture. Gently fold in the remaining egg white until well combined. Finally fold in the melted butter. Keep this separately.
Prepare the patterned joconde paste:
Beat the butter and sugar until it looks light and fluffy. Slowly add the egg white and continue beating until well combined. Fold in the sifted flour and cocoa.
Prepare the pattern:
Spread a thin layer of the joconde paste in a silicon mat. Use a ruler to drawn inclined lines on it. Place the silicon mat on a upside down baking sheet and slide it into the freezer. Let it sit in the freezer for approximately 15 minutes until it looks firm.

Preheat the oven to 250 degree Celsius. Quickly pour the joconde sponge on top of the pattern. Spread it evenly. Bake it in the preheated oven for 15 minutes until springs back.
Take the sponge outside and immediately invert it over a sheet of baking paper sprinkled with icing sugar.
Prepare the moulds:
Take the moulds of your size and shape which you desire. Grease the inside of the moulds with butter and line with cling film or baking parchment. Baking parchment paper holds the filling well.
Cut a strip from the sponge such that it fits your mould. Gently place it inside the mould and press it in the edges.
Spoon the mousse layer inside the mould. Then prepare the custard filling( according to your package instructions) and pour it on top of the mousse. Allow it to set. then prepare the jelly according to package instructions and pour it on top to set.
That's it you have your finished dessert, you can serve it with some fresh selection of fruits.
Sending this recipe to Ally's Delicious desserts
Sunday, December 26, 2010
Stollen Wreath- Daring Baker's Challenge for December 2010

This month Daring Baker's Challenge is by Penny of Sweet Sadie's Baking. This challenged us to make this incredible Stollen. Challenges are tough to face it but when it is a sweet challenge like Daring Baker's Challenge, I'm sure everyone will love it, I truly enjoy it a lot every month when I check for a Daring Baker Challenge and more than that when I make it.

Coming to this month challenge, Stollen is a traditional German bread made during Christmas, what an appropriate challenge during this month. Stollen is bread loaded with dry fruits and candied peel, some breads are also filled with marzipan. Just baking a stollen will fill your home with the scent of festive mood, it smells simply great. Thank you Penny for the lovely challenge you have given this month.

Preparation Time: 30 minutes+ rising time
Cooking Time: 40 minutes
Serves 8 to 10
Ingredients:
All purpose flour- 375 g
Warm milk- 100 ml
Egg- 1
Active dried yeast- 7 g
Melted Butter- 50 g
Brown sugar- 50 g
Mixed dried fruits( raisins, cranberries, currant etc..)- 75 g soaked in orange juice
Cinnamon powder- 1/2 tsp
Grated orange zest- 1/2 tsp
Grated nutmeg- 1/2 tsp
Salt- 1/2 tsp
Melted butter for brushing on top
Icing sugar for dusting on top
Method:
Sift the flour in a large, add salt, yeast, cinnamon, nutmeg, and sugar mix it well. Make a well in the center, add the melted butter and warm milk and orange zest. Mix it with a electric mixer and make it into a smooth elastic dough. Now add the soaked dry fruits and fold inside the dough. Place the dough in a clean oiled bowl, cover with a cling film and allow it to rise for 2 hours or until doubled in size. Take the dough, punch the air back. At this stage keep the dough wrapped up in refrigerator for overnight.
Next day take the dough and leave it outside for 2 hours to return to room temperature. Then roll the dough into a rectangle, roll it up like a Swiss roll. Join the two ends together. Using kitchen scissors make cuts along outside of the dough to make it look like wreath. Cover loosely with cling film, leave it in a warm place to rise for about 1 hour or until doubled in size.


Preheat the oven to 190 degree Celsius. Place the wreath in the preheated oven and bake it for 20 minutes, then turn the wreath to 180 degrees and bake it for another 20 minutes.
Take it out from the oven immediately brush with butter and dust it with Icing sugar. I also made few marzipan decoration.
Enjoy making your own wreath and have fun :)
This festive wreath goes to BBD 35, Yeastspotting, Bake- Off and Suma's Baking event.
Monday, November 29, 2010
Crostata Con La Crema or Custard Tart- Daring Bakers Challenge for November 2010

Hi Everyone,
I'm back with my late submission for daring baker's challenge. Although I completed the challenge before I left Germany, I couldn't post it on time. So here I'm post it late after coming back from India.
This month challenge is from Simona of briciole. She challenged us to make Crostata( tart) with her own recipe and use any filling of our choice. Crostata is a Italian dessert, it's basically a tart with fruit or cream filling.
For me the queen of all tarts would be the one and only custard tart, I never enjoyed any other tart so much as a custard tart. Simona also gave us a few ideas for the filling also, I used her pastry cream filling which was simply fabulous. Her pastry also worked very well, I consider this as the best of all the tarts I made so far. The pastry and the cream everything was just in the right consistency except that I break some edges of the tart. Thank you Simona for giving us this lovely challenge.

Preparation Time: 40 minutes
Cooking Time: 50 minutes+ cooling time
Serves 8
Ingredients:
For the pastry:
Wholemeal or plain flour- 235 g / 8 1/4 oz
Caster sugar- 75 g / 3 oz
Unsalted cold butter- 115 g / 4 oz
Vanilla extract- 1/2 tsp
1 large egg and a egg yolk
a pinch of salt
For the pastry cream:
Milk- 500 ml / 20 oz
Sugar- 65 g / 2 oz
Plain flour- 3 tbsp
Vanilla extract- 1 tsp
2 large eggs
Grated nutmeg- 1 tsp
Method:
Prepare the pastry:
Sift the flour and salt in a large bowl. whisk together the egg in a small bowl. Add the sugar to the flour mixture and mix well. Add the butter cut into cubes in the flour mixture and work with your hands gently until it resembles fine breadcrumbs. Finally add the egg and bring the dough together. Flatten the dough, wrap it in a cling film and refrigerate for minimum of two hours or overnight.
Prepare the pastry cream:

Whisk together the egg and sugar until it resembles very pale and creamy. Add the flour to the egg mixture and whisk well until it gets incorporated. Heat the milk and extract in a pan until it reaches just under boiling point. Pour the milk little by little into the egg mixture and whisk well. Return the mixture to the heat again and keep stirring well until it becomes thick custard. Pour the custard in a bowl and cover the top with cling film to avoid forming film on top. Allow the filling to cool completely, you can make it the previous day and store it in the refrigerator.
Assemble the tart:

Preheat the oven to 180 degree celsius.
Take the dough out from the refrigerator, roll it out between two cling film or parchment paper. Gently place the rolled dough in a greased tart tin. Press the edges down. Prick with a fork all over the dough. Trim all the dough in the sides. Place a parchment paper on top of the dough and fill with baking beans. Blind bake for 5 minutes.
Allow it to cool completely. Pour the custard inside the tart case. I made few decorations using the remaining dough which is totally optional. Sprinkle the grated nutmeg on top. Bake for 35 to 40 minutes or until golden brown on sides.
Let it cool down for a while and serve it into wedges.
Wednesday, October 27, 2010
Go Nuts For Doughnuts- Daring Bakers Challenge For October 2010

This is my successful third month with Daring Bakers. I never expected I would be able to complete three challenges with Daring Bakers. I know there are some brilliant bakers who have been baking with Daring Bakers for years completing so many delicious challenges but for me three itself makes happy ( Alhamdulillah).
This month our challenge is by Lori of Butter Me Up. She challenged us to make doughnuts. A person with sweet tooth will definitely go nut for doughnuts. We were given two options one with yeast and the other one is old fashioned buttermilk doughnuts. Since I had everything available for yeast doughnuts, I went for the yeast option. We were also given other options to change the flavour and shape of the doughnuts. I just used the traditional one , I dint go for any additional flavours or shape. Actually I dint have the regular doughnut cutters, so I used a glass for the bigger round and and small cap of the bottle for the small round.
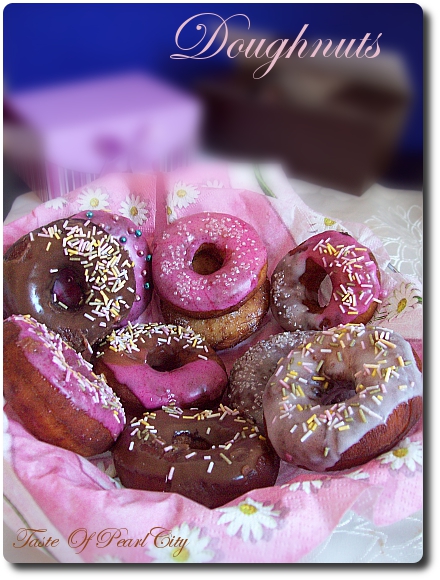
Since doughnuts are my favourite which I always enjoy from a bakery, these freshly home made doughnuts are simply irresistible. There is something really special when it's fresh and homemade...
Ingredients:
Dough:
White bread flour- 400 g / 16 oz
Wholemeal flour- 250 g / 10 oz
Dried yeast- 14 g/ 6 tsp
Warm water- 80 ml/ 1/3 cup
Milk- 300 ml/ 1.5 cup
Eggs- 2
Sugar- 50 g/ 2 oz
Salt- 1/2 tsp
Butter- 70 g/ 3 oz
Nutmeg- 1/2 tsp grated
For the icing:
For the vanilla glaze:
Icing sugar- 250 g/ 10 oz
Warm water- 1 tbsp
Vanilla extract- 1 tsp
Pink colouring- a pinch
Sugar sprinkles( optional)
For the chocolate glaze:
Plain chocolate- 50 g / 2 oz
Butter- 1/2 tbsp
Icing Sugar- 150 g / 6 oz
For sugar doughnuts:
Sugar- 1/2 cup
Cinnamon powder- 1 tsp( optional)
Oil for deep frying
Method:
Prepare the dough:
Sift the flour in a large bowl, add the sugar, yeast and salt mix well. Heat the milk, add the butter to the warm milk and mix well until the butter gets completely melted. Add the eggs to the flour mixture, add the warm water and milk mixture. Beat with the electric beater fixed with dough hook until you get a smooth dough.
Place the dough in a clean oiled bowl and cover with a cling film allow it to rise for 1 hour or until doubled in size.
Prepare the doughnuts:
Once the dough has risen knock the air back. Divide the dough into two equal halves. Roll out the dough into 9mm thickness. Cut the doughnuts using a doughnut cutter. I used a glass and small cap of bottle to cut the circles.

Place the doughnuts in a tray, cover loosely with a cling film and allow it to rise for another 30 minutes or until it looks puffed up.
Heat the oil in a skillet or whichever pan you use for deep frying would be good. Drop the doughnuts one by one and deep fry it until reaches a golden brown in colour.
Prepare the glaze:
For the glaze:

Vanilla glaze
Sift the icing sugar in a bowl, add the extract and hot water, mix well. Pour the glaze on top of the doughnuts, or dip the doughnuts in icing.
For colouring, add a drop of colouring to the icing.
Use any sprinkles of your choice.
Chocolate Glaze:
Melt the chocolate and butter in a bowl sitting on top of pan of simmering water. Stir until the chocolate and butter gets completely melted.
Remove the bowl from water. Add the sifted icing sugar and mix well without any lumps. Dip the doughnuts in the icing and sprinkle with sugar sprinkles or chocolate or chopped nuts.
For Sugar Doughnuts:

Mix the sugar and cinnamon powder together. Roll the doughnuts in cinnamon sugar.
Have fun in making the doughnuts and enjoy the doughnuts.
If you are interested in Daring bakers and want to join click here.
This recipe goes to Yeastspotting.
Monday, September 27, 2010
Sugar Cookies With Royal Icing, Daring Bakers Challenge September 2010

This is my second challenge with Daring Bakers, as always last minute preparation. I prepared the cookie only yesterday, and pictured today and posting now. Everything was in a rush.
The challenge for this month is from Mandy, What the fruit cake , we have to prepare a basic sugar cookie and make royal icing and use our creativity and imagination to make different shapes. We were also asked to choose a theme for the month of September and prepare the cookie accordingly. If I have to think something special for the month of September, it has to be Eid, nothing can be more special than that.
Actually we visited our friend's place for Eid, so I thought I'll make these cookies and take it for them, since I couldn't make during that time now I made it.
Anyway I'm not an expert in these decorating things, so I just made a very simple one with few colours of icing.
So here I'm with a very belated Eid wishes to Muslims all over the world.
Recipe For Sugar Cookies and Royal Icing:

Ingredients:
For the Cookies:
Plain flour- 400 g
Butter- 200 g
Sugar- 200 g
Vanilla extract- 2 tsp
Egg- 1
For the Royal Icing:
Egg whites- 2
Lemon juice-2 tsp
Icing Sugar- 315 - 375 g
Vanilla extract- 2 tsp
Method:
For the cookies:

Cream the butter and sugar, do not over mix, just mix them to combine. Over mixing will result in spreading the cookies while baking.
Add the egg and beat together, then add the extract , mix it up. Finally add the sifted flour and mix it well to form like a dough. Divide the dough into two balls.
Roll out the dough between two sheets of parchment paper, cover with a cling film and chill in the refrigerator for minimum of 30 minutes.
Preheat the oven to 180 degree Celsius, fan oven 160 degree Celsius.
Take out the rolled dough from the refrigerator and cut it into desired shapes, I used a cookie cutter to get few shapes. Bake it in the preheated oven for 8 to 10 minutes, depending upon the size of the cookie.
If you are using a big cookie shape, it might take longer time.
Take it out from the oven and leave it cool down completely before doing the icing.
For the royal icing:

Mix the egg white and lemon juice in a large bowl. Add the extract and mix again. Add the sifted icing sugar little by little and mix it together smoothly. It becomes like a thick white paste.
Now add the colours according to your wish and start decorating.
You can use a piping bag, or even a freezer bag by cutting it's tip.
When you are using a freezer bag, make sure there is no air inside, so that the flow will be smooth when you are making the icing.
Also have a wet cloth or wipes on your side to wipe the tips of icing bag.
Use the icing immediately after you make, since it'll set quickly if you are making in a quite thick consistency.
Remember to cover the bowl of your icing, to stop forming layers on top.
There are two different types of icing flooding and thick icing.
Flooding method use less icing, which is used to cover big areas, and thick consistency for outlining.
Actually I used very less icing sugar, which resulted in a too flooding consistency and it came outside the shapes. So I din't get any proper shapes, but it tasted really good. My kids just loved these cookies, how will they say no to these colourful and sugary cookies.
Have fun making your own sugar cookies with different decoration.
If you would like to join the Daring Bakers and have fun in making all these delicacies click here.
Friday, August 27, 2010
My First Challenge With Daring Bakers- Nutty, Toasty, Creamy and Cool
August 2010 Daring Bakers Challenge- Nutty, Toasty, Creamy and Cool
Baked Alaska

This is my first challenge with Daring Bakers, I don't know we need any introduction about Daring Bakers any food blogger or non-food bloggers who is interested in baking will definitely know about Daring Bakers. Even before blogging I used wait for every month Daring Bakers challenge to see the recipes they come up with.
Daring Bakers was started by two lovely ladies Lisa and Ivonne, when they first challenged themselves for baking Pretzels in back 2009, now Daring Baking has members all over the world to try something new once a month in their kitchen.
Petit Fours

This month the challenge is brought to us by Elissa of 17 and baking. You can understand how young she is from the title of her blog. This young, talented cook has given us some amazing challenge for this month.
There are two desserts in the challenge, and we have been given a option to make any one of them. Since this is my first challenge, I went ahead and made two of them.
Our challenge for this month is Baked Alaska and Petit Fours. I never made either of these desserts. Baked Alaska is always been a challenge to me, I never dared to try that, but with Elissa's step by step clear instructions I managed to get it right.
Actually I'm bit busy today, so I have to be really quick so my pictures are not that appealing and I haven't given step by step pictures. Okay now let's get straight into the recipe now.
For Baked Alaska you need:
Browned Butter Cake:

Ingredients:
Stawberry Icecream

Ingredients:
Light cream- 300 ml
Milk- 300 ml
Egg yolks- 3
Sugar- 200 g
Cornflour-1 tsp
Strawberries- 150 g( pureed)
Method:
Beat the egg yolks , sugar and cornflour until thick and creamy. The sugar has to completely dissolve in the mixture. Combine the milk and cream together and heat it just under boiling point. At this stage immediately pour the milk into the egg mixture little by little whisking continuously.

Once it's well combined, return the mixture to the heat again and heat it in medium to low heat whisking continously until the mixture coats the back of the spoon.
Remove it from heat and let it cool down completely. Then add the puréed strawberries and stir well. Churn in the ice cream machine according to your machine instructions.
Allow it to set in the freezer until required.
For Assembling:

For Baked Alaska:

For Baked Alaska cut a circle out of the cake using a tea cup. Line the inside of the tea cup with a cling film hanging outside, fill the cup with ice cream and cover the edges, freeze it completely.
Take the ice cream after it's completely frozen, pull the cling film out and remove it from the cling film and flip it upside down.
For making 1 tea cup Alaska you'll need two eggs whites for meringue layer.
Meringue:
Egg whites- 2
Sugar- 50 g
Whisk the egg whites until soft peaks forms , add the sugar little by little and keep whisking until stiff peaks form.
Spread the meringue layer on top of ice cream layer using a spatula or using a piping bag. Bake it in the preheated oven at maximum temperature until it's slightly brown on top. Serve immediately.
For Petit Fours:
For the Chocolate Glaze;
I din't use any cream I just melted 200 g of dark chocolate and white chocolate.
Cut the cake into half, spread the ice cream layer, i also sliced some strawberries and placed them in the middle and top it with the remaining half. Cover tightly with a cling film and freeze it overnight. Cut the into squares and dip it in the melted chocolate. Serve immediately.
Both the desserts were amazing, have fun in making them.
Baked Alaska

This is my first challenge with Daring Bakers, I don't know we need any introduction about Daring Bakers any food blogger or non-food bloggers who is interested in baking will definitely know about Daring Bakers. Even before blogging I used wait for every month Daring Bakers challenge to see the recipes they come up with.
Daring Bakers was started by two lovely ladies Lisa and Ivonne, when they first challenged themselves for baking Pretzels in back 2009, now Daring Baking has members all over the world to try something new once a month in their kitchen.
Petit Fours

This month the challenge is brought to us by Elissa of 17 and baking. You can understand how young she is from the title of her blog. This young, talented cook has given us some amazing challenge for this month.
There are two desserts in the challenge, and we have been given a option to make any one of them. Since this is my first challenge, I went ahead and made two of them.
Our challenge for this month is Baked Alaska and Petit Fours. I never made either of these desserts. Baked Alaska is always been a challenge to me, I never dared to try that, but with Elissa's step by step clear instructions I managed to get it right.
Actually I'm bit busy today, so I have to be really quick so my pictures are not that appealing and I haven't given step by step pictures. Okay now let's get straight into the recipe now.
For Baked Alaska you need:
- Cake Base
- Ice cream
- Meringue
- Cake
- Ice cream
- Chocolate glaze
Browned Butter Cake:

Ingredients:
19 tablespoons (9.5 oz) (275g) unsalted (sweet) butter
2 cups (200g) sifted cake flour (not self-rising; sift before measuring) (See “Note” section for cake flour substitution)
1 teaspoon (5g) baking powder
1/2 teaspoon (3g) salt
1/2 cup (110g) packed light brown sugar
1/3 (75g) cup granulated sugar
4 large eggs
1/2 teaspoon pure vanilla extract
2 cups (200g) sifted cake flour (not self-rising; sift before measuring) (See “Note” section for cake flour substitution)
1 teaspoon (5g) baking powder
1/2 teaspoon (3g) salt
1/2 cup (110g) packed light brown sugar
1/3 (75g) cup granulated sugar
4 large eggs
1/2 teaspoon pure vanilla extract
Method:
1. Preheat the oven to 325°F/160°C and put a rack in the center. Butter and flour a 9”x9” (23cmx23cm) square pan.
2. Place the butter in a 10” (25cm) skillet over medium heat. Brown the butter until the milk solids are a dark chocolate brown and the butter smells nutty. (Don’t take your eyes off the butter in case it burns.) Pour into a shallow bowl and chill in the freezer until just congealed, 15-30 minutes.
3. Whisk together cake flour, baking powder, and salt.
4. Beat the brown butter, light brown sugar, and granulated sugar in an electric mixer until light and fluffy, about 2 minutes. Beat in the eggs one at a time, mixing well, and then the vanilla extract.
5. Stir in the flour mixture at low speed until just combined.
6. Scrape the batter into the greased and floured 9”x9” (23cmx23cm) square pan. Smooth the top with a rubber spatula and rap the pan on the counter. Bake until golden brown on top and when a toothpick inserted into the center comes out clean, about 25 minutes.
7. Cool in the pan 10 minutes. Run a knife along the edge and invert right-side-up onto a cooling rack to cool completely. Stawberry Icecream

Ingredients:
Light cream- 300 ml
Milk- 300 ml
Egg yolks- 3
Sugar- 200 g
Cornflour-1 tsp
Strawberries- 150 g( pureed)
Method:
Beat the egg yolks , sugar and cornflour until thick and creamy. The sugar has to completely dissolve in the mixture. Combine the milk and cream together and heat it just under boiling point. At this stage immediately pour the milk into the egg mixture little by little whisking continuously.

Once it's well combined, return the mixture to the heat again and heat it in medium to low heat whisking continously until the mixture coats the back of the spoon.
Remove it from heat and let it cool down completely. Then add the puréed strawberries and stir well. Churn in the ice cream machine according to your machine instructions.
Allow it to set in the freezer until required.
For Assembling:

For Baked Alaska:

For Baked Alaska cut a circle out of the cake using a tea cup. Line the inside of the tea cup with a cling film hanging outside, fill the cup with ice cream and cover the edges, freeze it completely.
Take the ice cream after it's completely frozen, pull the cling film out and remove it from the cling film and flip it upside down.
For making 1 tea cup Alaska you'll need two eggs whites for meringue layer.
Meringue:
Egg whites- 2
Sugar- 50 g
Whisk the egg whites until soft peaks forms , add the sugar little by little and keep whisking until stiff peaks form.
Spread the meringue layer on top of ice cream layer using a spatula or using a piping bag. Bake it in the preheated oven at maximum temperature until it's slightly brown on top. Serve immediately.
For Petit Fours:
For the Chocolate Glaze;
I din't use any cream I just melted 200 g of dark chocolate and white chocolate.
Cut the cake into half, spread the ice cream layer, i also sliced some strawberries and placed them in the middle and top it with the remaining half. Cover tightly with a cling film and freeze it overnight. Cut the into squares and dip it in the melted chocolate. Serve immediately.
Both the desserts were amazing, have fun in making them.
Subscribe to:
Posts (Atom)
LinkWithin
